Wednesday, March 31, 2010

Jump Breaks are Useful even if you only show one Post per Screen

This article explains why it is useful to put jump-breaks into your post, even if normally you only show one Post on each "page" (ie screen).


Overview

Jump breaks are a feature that lets you show only the top portion of a post to start with:  if the reader wants to see the rest of the contents, they need to click on a "show me more" link, which expands to show the whole post.

Google have described adding "After the jump" breaks to posts, and the various factors involved in using them.

I'd never bothered with them, because on almost all of my blogs, I only show one Post per Screen.

However I recently realised that it is worthwhile putting them in anyway:  if only one Post is showing, they won't have any affect.  But there are some screens where they are helpful.


Not all Screens are Like the Main Screen

(NB  Until Google introduced Pages, I would have said Posts and Pages:  now, I say Posts and Screens:  a Post is one item that you publish, a Screen is a collection of them.   Most of the Google Help documentation still talk about Pages in this way - but it's confusing, because of the static-pages feature getting the same name.)

The main screen is that one that is opened when a reader goes to your blog for the first time, or when they select an article (eg from the archive gadget) and go to it.

However there are various other types of screen too.   For example:
  • The Labels gadget displays all (or a group of) the labels that you have given to posts.  

    When a reader clicks on a label in this gadget, the Screen displays a list of Posts that have this label.
  • The Archive gadget displays the dates that posts have been made on

    When a reader clicks on a time-period (eg month, week) in this gadget, the Screen displays a list of Posts that were posted in this time.

In these Screens, more than one Post is displayed (no matter what setting you have for Posts per Page).   And if your Posts have jump-breaks near the top, then this list looks a lot more like a list, so is a lot easier for your readers to use.   (You can see an example of this by clicking here - this will show you a list of all the posts in this blog about Facebook, for example)


Using a Post Template

I now have a template for new posts, because this makes it so much easier to structure articles in the same way, which makes them better for readers.

The Jump-break, which shows in Compose mode, makes a useful distinction between the article summary at the top (more about why this is useful later - that article's not finished yet!) and everything else after the break.


AdSense

If you are an AdSense publisher, then Google have said that there are some AdSense ads which  are cost-per-view, not cost-per-click, but that advertisers are only interested in having them showing when a reader first looks at the page.  Google have a way of calculating whether a specific advertisement is "above the break" or not.   We don't know what the rule for this is, but my guess is that this may include asking whether the ad is above or below a jump-break.  


Related Articles: 


Using Labels to categorise your posts

Setting up AdSense on your blog

Giving your blog a homepage

Setting the date for a post

The difference between Posts and Pages.
#
Read more > Jump Breaks are Useful even if you only show one Post per Screen

Monday, March 29, 2010

Types of Blogger template

This article is about the types of template that apply to your Blogger blog, and how you can work out what type of template you have. 

What types of template does Blogger have:

Puppeter templateBlogger users templates to know how to structure your blog:   all template-types except the new Dynamic-view templates allow you a lot of freedom to customise how your blog looks.

Ttemplates are the "framework" that Blogger uses to let us do this, but still offer the features that a blogging platform provides.
Currently, each blog made with Blogger has:
  • One post template:
    There is only one type of post template, adn it is edited from Layout > Blog Posts - and not customisable apart from this
  • One design template:  
    This template may be one of four different types:  Dynamic, Designer, Layout and Custom.  

Also, each template may have a mobile template, which is used only when someone views the blog using a mobile device (eg smartphone).   A blog only has a mobile template if this has been enabled for it (on the Template screen).

When you have looked at a few blogger options, you will begin to recognise the different types of templates, just from the way blogs made with them look on screen.    The following sections describe the types of design templates (which include Designer templates, just to be confusing), and show you how to tell if your blog is using them.

There is also a very quick way to find out the name of your template - often knowing the name will let a Blogger Helper understand what the problem is, and so make suggestions about how to fix it.


The Custom Template:
The first design template that Blogger had was a custom template - and there are still some blogs with these today.

With a custom template, the only way to change the layout of your blog is to edit the HTML;  there are no widgets, and no drag-and-drop editor for positioning things.


How to work out if you have a Custom template:

Post-Sept 2011 Blogger (aka the new interface):  
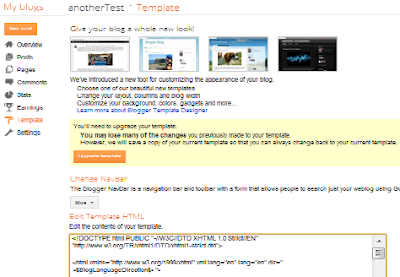
If you go into the Template tab, and the first thing you see is "Give your blog a whole new look!", and at the bottom of the screen there is an area called "Edit Template HTML", then your blog is using a Classic template.


Pre-Sept 2011 Blogger (aka the old interface):  
If your menu options include "Template", but don't include "Layout", then you have a Custom template.


Layout Template:
The Layout template was the next to be introduced.   It includes the Page Elements editor and the idea of Gadgets (previously called Widgets and Page Items).  This was a great improvement because it let blogger users move items around their design by drag-and-drop, instead of by editing HTML.

These templates (Minima, Rounders, ....) were a great step forward in the early 21st century, but web-technology has moved on.     They are no longer available to choose in the new Blogger interface, but  can still be selected in the old interface.

How to work out if you have a Layout template:

Post-Sept 2011 Blogger (aka the new interface):  
Go to the Templates tab, and choose Customize.   If there is no template name given underneath "Live on Blog", and no template selected in the area to the right, then you have a Layout template.


Pre-Sept 2011 Blogger (aka the old interface):  
Go to the Design tab and choose Template Designer.
If the Background and Layout tabs (down the left hand side) have message like "Not applicale for this template", then you have a Layout template.


Designer Templates
Designer templates were introduced in early 2010, when the Template Designer was first available in Blogger in Draft.    They provide a far wider range of basic designs, and far more options for choosing the number of columns, column width, background images,footer structure, colour scheme, etc.

How to work out if you have a Designer Template:

Post-Sept 2011 Blogger (aka the new interface):  
Go to the Templates tab, and choose Customize.   If there is a template name under "Live on Blog", and it is not from the names under Dynamic Views on the right, then you have a designer template.


Pre-Sept 2011 Blogger (aka the old interface):  
Go the Design tab and choose Template Designer.   
If you have options to change the column structure, then you have a Designer template.


Dynamic Templates:
Dynamic view templates were first introduced in April 2011.  They are quite different from the other template types, because they rely on your RSS feed as the content source, and have a number of different viewing options, and actions like adding a gadget are quite different from other templates.  Some dynamic templates use each post's thumbnail picture as the main navigation tool.

How to work out if you have a Dynamic Template:


Post-Sept 2011 Blogger (aka the new interface):  
Go to the Templates tab, and choose Customize.   If there is a template name under "Live on Blog", and it is from the names under Dynamic Views on the right, then you have a designer template.

Also, if you go into the Widths sub-tab, you will see a message "Not applicable for this template.


Pre-Sept 2011 Blogger (aka the old interface):  
Go to the Design tab.   If there is a template name under "Live on Blog", and it is from the names under Dynamic Views on the right, then you have a designer template.
Also, if you go into the Widths sub-tab, you will see a message "Not applicable for this template.


Related Articles: 


Editing your Blog's Template:  Advantanges and Disadvantages

Seven Simple Steps to a Snazzy new-look Blog (moving to a designer template).

Finding out the name of your blog's template

What is RSS?

Post.thumbnail - an image to summarise each post

Adding a gadget to a dynamic-view template
Read more > Types of Blogger template

Volvo C30 2010

Volvo C30 2011Enquanto a Europa recebe o face-lift do modelo em 2009, o Brasil veio receber o novo C30 apenas agora. Entretanto, além do visual rejuvenescido, o compacto ganhou um abatimento no preço, vindo agora a R$ 79.990, o que pode reforçar ainda mais sua fama de carro de imagem.

Como na maioria das mudanças deste tipo, o C30 ganhou frente totalmente nova, seguindo as últimas tendências da marca, mas teve as laterais inalteradas, e sua traseira recebeu um leve redesenho. Por outro lado, a parte mecânica permaneceu sem novidades, trazendo como opções de motor o 2.0 16v de 145 cv e o 2.5 turbo de 230 cv, com câmbio manual de cinco marchas, semi-automático de seis e dupla embreagem, ou o automático Geartronic, de cinco.

Volvo legítimo, o C30 jamais poderia deixar a desejar no pacote de segurança. Desde as versões básicas ele traz diversos airbags e uma infinidade de controles eletrônicos, dentre eles os de estabilidade e tração. Das cinco versões do modelo, três vêm com o motor 2.0: a básica, com câmbio manual de cinco marchas por R$ 79.990, a S, que traz melhor pacote de itens e o câmbio de seis marchas por R$ 86.990, e a automática, por R$ 91.990, todas com rodas de 16 polegadas.

As versões equipadas com o motor turbinado sempre trazem rodas aro 17 e o câmbio automático, custando a comum R$ 109.990 e a mais equipada Top vindo por R$ 119.990. Todos os C30 têm 13 opções para a cor da carroceria e cinco para a cor do spoiler inferior.

Read more > Volvo C30 2010

Creating a Shadow Blog

This article is about how to make a "shadow blog" - one that has the same structure as our real one, but less content, and which used only for testing.   

Overview

By Jérôme from Rouen, FRANCE
(5+6+7+8+9+10+11+12)
 [CC-BY-SA-2.0 (www.creativecommons.org/licenses/by-sa/2.0)],
via Wikimedia Commons
Sometimes, before you make a major change to a blog (or even a minor change to a popular one), you will want to test it before applying it to your blog.

You may even want to go one step further than getting your posts right before you publish them, and actually test the "look" of posts before you put them into your main blog.  (After you have got your post complete in your shadow-blog, you can copy the HTML from the shadow to the main blog, so that the formatting etc is all carried over:   See How to copy an individual post for details)


A shadow blog has is a place where you can do this.   It has
  • The same structure as your real one, and
  • Just enough content so that you can do some changes and test if they're working properly:  generally two or three more posts than the maximum you show on any on a screen is enough.

To make a shadow blog, you need to
  • Create a new, private, blog with the same base template as your existing blog
  • Copy your existing template into it, and 
  • Copy some of your existing posts into it.


Detailed Instructions:

1  Make a blog to work with:

Find out what template your existing blog is using

In your existing blog, download a copy of your template.   (See the first part of Editing your template, if you're unsure how to do this.)

Save the downloaded file somwhere (remember where, you'll need it below).

Go to the Dashboard, and click Create a Blog.  Give it a name and URL like "testing-YOURBLOGNAME"

When Blogger asks which template to use, choose your current template, (if it's on the list shown), or just any template.

After the blog has been created, press Start Blogging, and then go to the Settings / Basic tab:   Set "Add your blog to our listings?" and "Let search engines find your blog?" to No   (since this blog is just for your testing).

Go to Layout / Pick New Template   (or to Layout / Designer Template if your existing blog has a designer template), and choose the same template that your existing blog has.

Go to the Templates tab, and choose Backup/Restore.

Click Choose File, and navigate to the downloaded template that you made earlier.


2  Get some posts to test with:

Choose whether to import all your existing posts into the testing blog, or just copy some individual posts

Any links in your posts won't be re-directed, so when you are testing, you will find that clicking any internal links in your posts will take you back to your main blog. If you are moving all posts, you could avoid this by opening the export file with a text-editor, and doing a fine/replace to change the main blog's URL to the testing blog's URL in any links.


Related Articles: 


Import all your existing posts

Copy an individual post.

What template does your blog use?

Editing your template

Polish your posts before you publish them to the world
Read more > Creating a Shadow Blog

Saturday, March 27, 2010

Making a Custom Map in Google Maps

This article is about creating custom maps using Google maps.  It supports another article about putting maps into Blogger.  But the techniques apply whenever you want to generate a Google map of your own, and embed it into a web-site etc.


Custom Maps vs regular Google Maps:

Google Maps already lists vast numbers of road, rivers, buildings, businesses etc.  And these are being added to all the time.

Very often, you can simply search for what you want, and Google Maps will show it to you.  For example, searching for "Empire State Building" shows a map, with links to the building itself, and several surrounding businesses - like this.


But sometimes, the location you want is not already be in Google Maps.

If the place is "yours" then you can either register it through the Local Business Centre.  But if it's not appropriate for you to own the Google Places listing, or if you want to show multiple places on the same picture, it may be better to create a Custom Map.

Also, Custom Maps are the tool to use if you want to show routes:  for example, one of my blog-sites has about 30 custom maps that show the routes taken by local bus services.


How to create a Google custom map:


1  Go to Google maps (http://maps.google.com/)


2  Sign in
The same google account that you use for blogger is probably the best one to use.  And if you've already signed in to blogger, you may find that you're already signed in.


3  Make a new map
Go to My Maps (link on the left, near the top), and then Create a New Map.


4  Add your content
Put in placemarks, shapes and lines - both along roads and not.   You may like to use different colours for places that you have been to, vis places you're still planning to visit.

This page is good for learning how to edit maps:   http://maps.google.com/support/bin/answer.py?hl=en&answer=62843


Tip:   If you're putting in lines along roads, don't do one long line that shows the whole route.   If you do, and something goes wrong with it, then you have to delete the whole line and start again.   Instead, draw smaller parts of the line, and make up the overall route from them.


5  Save your map
Your map will auto-save as you make editing changes.  Beware of this - it means that mistakes you make get saved quite quickly, too).  When you have finished, press Save or Done one last time, just to be sure.


6  Exit and re-start Google Maps
In the same browser window, go into another google application (I usually use News, because the link is right beside Maps in the very top left of the screen).  Then go back into Maps.


7  Check your map
Open My-Maps, and then the map that you just created.   Check it's ok.

I've added this step from bitter experience!   Sometimes, especially with lines drawn along roads, Google Maps seems to add some extra bits that you didn't put in, and which don't show on the map when you're editing it initially.


What next:

After you have created a custom map, you may want to share it by putting it into a blog (or other website).

Or you may just use it for yourself, or send links of it to other people.


Related Articles: 


Putting a custom Google Map into your blog

Adding a Picasa slideshow to Blogger

HTML commands to put a picture and text side-by-side
Read more > Making a Custom Map in Google Maps

Friday, March 26, 2010

Honda Accord EX 2.0

Honda Accord EX 2.0 O luxuoso sedã chega à linha 2010 com o mesmo visual, mas traz uma novidade interessante: a troca da versão básica LX pela topo EX, mas agora com o motor 2.0, combinação que chega por R$ 99.800 pra fazer companhia à outra EX, esta com motor V6 e que permanece inalterada no topo da gama.

A troca de versões pode parecer estranha, mas a LX se ressentia de um pacote de equipamentos muito básico (nem computador de bordo trazia), o que a deixava nada atrativa em comparação com a concorrência, como o novo Ford Fusion. Por outro lado, a EX já impressiona desde o exterior, oferecendo faróis especiais, ponteira cromada do escapamento e rodas de liga leve de 16 polegadas.

Seu pacote de acessórios foi realmente melhorado em relação à LX, agora vindo com ar-condicionado dual-zone, bancos e volante revestidos em couro, sistema de som que usa a tela do computador de bordo, e quanto à segurança, airbag duplo e freios com ABS e EBD, entre outros itens. O motor 2.0 16v i-VTEC oferece 156 cv, sempre vindo com câmbio automático de cinco marchas.

Read more > Honda Accord EX 2.0

Thursday, March 25, 2010

Ford Ka Trail

Ford Ka Trail

Se a Ford foi a única marca que investiu nos aventureiros urbanos a ponto de criar um modelo exclusivamente destinado a este mercado, o EcoSport, os próximos passos que tomou foram mais comedidos, mas ainda assim com sucesso, como o Fiesta Trail. Aproveitando que o compacto fez sucesso com o pacote de itens a ponto de merecer tê-lo como uma versão de linha, a Ford agora tenta aplicar a fórmula ao modelo de entrada, mais ou menos como fez com o “esportivo” Ka ST. Criado pela empresa Keko, o pacote de acessórios do Ka Trail traz protetores para os parachoques dianteiro e traseiro, rack de teto e adesivos exclusivos da versão. Sua instalação pode ser feita em qualquer concessionária da marca, a um preço estimado de R$ 1200.

Read more > Ford Ka Trail

Making a Gadget that looks like a Post

This article is about how to make a gadget display (almost) all the things you can put into a post in Blogger.

Summary:

Previously, I've described how a gadget that only appears on the first screen is one option for giving your blog a home page.

One apparent weaknesses with a gadget is that it can only contain one type of "thing" - text, or a picture, or a poll or - or whatever other type of gadget you choose.

But - an HTML/Javascript gadget can contain almost any valid HTML.   And each post is really just made up of HTML.   So:

You can make a gadget look like the body of a post by 
copying the HTML from a post, and pasting it into the gadget!
 
The picture below is an example of what such a gadget looks like.  I've given it a title ("Test Gadget"), though for a real blog, I probably wouldn't bother.   Notice that unlike the Post after it, the gadget doesn't have an author, date, comments or an edit-this link

See further down in the article for detailed instructions, and also for notes about which features from Posts will not show up within your gadget.


Follow these steps to make a gadget look like a Post

1  Create a new post  (you won't be saving this,  you are simply using it to get the HTML)


2  Edit it in the usual way, until it is complete and ready to publish - but don't publish it.

3  Click on the Edit HTML tab at the top-right-side of the Post-editor (old interface) or the HTML tab at the top-left-side (new interface)


4  Put your cursor into the editing window, and select ALL the code that is shown.   (Ctrl / A does this in many systems)


Copy the HTML


6  Press Save Draft or Save Now   (not Publish Post)


Add an HTML gadget to your blog in the usual way


Paste the the HTML that you just copied into the Content field.


Save the gadget, and drag it to wherever you want it.


10  Once you're happy with the gadget, go back to Posting > Edit Posts, and delete the post that you used to make the gadget.   (This step is options, but it will stop you accidentally publishing the post later on.)


Post features that don't work in Gadgets:

Of course there are some features of Posts that don't work in gadgets:

Don't put anything into the title field - it's not part of the HTML for the post, so won't be displayed.   Instead, type in any title you want, and format it yourself.   (Search engines won't index contents from your welcome gadget very because of this - so make sure that the content is elsewhere in your blog too.)

Jump-breaks don't work:  you can put them into the post, but they have little or no effect on how the gadget looks.

Labels.  Gadgets don't have them, so don't bother.   (except if you want to keep the "construction" page around as a draft:  I often label things like with as "Site Admin" or similar)

Backing up.  Gadgets aren't included when you export a copy of your blog.   Gadget contents may not always be backed up when you export your template (I haven't tested recently) - actually, this is a good reason to keep the "construction post" around as a draft.


Related Articles: 


A gadget that only appears on the first screen is one option for giving your blog a home page.

Giving your Blog a Home Page
Read more > Making a Gadget that looks like a Post

Wednesday, March 24, 2010

Showing your oldest blog-post first - and the rest in reverse order.

Blogger does not have an option to display your posts in reverse order - so that the oldest post is first, and the most recent post is last.  But this article describes displaying your posts in this way by manipulating their post dates.  And it links to an article about some other possible options.


Overview:

Previously I've discussed the options for giving your blog a home page.  One option is to organise the post-date for each of your posts, so that you control the order posts are displayed in.

This is easy enough to do, although there are a couple of risks that you need to be aware of as discussed below.


Blogger Posts and the Post-date

Each Post in your blog has a date-time value, which is called its "post-date".   Normally , this is set to the date/time when you publish the post for the first time.  But you can change the post date for any post, and you can do this either when you post it first or later on.

The post-date is important because it controls the order that posts are shown in:
  • The post that appears first when a reader visits your blog is the one with the most-recent Post-date.
  • If you have more than one post-per-screen, then the next-most-recent post is on the screen underneath the first one.  And then the second-next-most-recent, etc.

When a reader is looking at any post, and they click Newer-Posts or Older-Posts, the post-date is used to decide what posts to show on the next screen.

This means that you can make your posts appear in the order than you wrote them (ie first post first, second post second, etc) by changing the Post-date so that:
  • your first post has the most-recent post-date, 
  • your second post has the next-most-recent-date, 
  • your third post has the third-most-recent poste date
  • etc
An alternative approach is to just make one post always appear first, and let the other posts appear in the order that you posted them. 


How to make your posts appear in reverse order, using dates:

1  Give your first Post a post-date (eg today), AND remember that date.

2  Give all other posts (even ones that you write next week, or next year) a post-date that is earlier than the post-date you picked in Step 1.
  • If you want your posts is strictly reverse order, you need to give each one a date that is earlier than any existing post.  This is quite easy:  just look at the list of posts in Posting > Edit Posts and scroll to the bottom of the list to see the oldest date used so far.
3  Turn off the post-date display on your posts (since the post-date won't make sense, because you're manipulating the dates).

  • To do this, go to the Design > Page elements tab (old Blogger interface) or the Layouts tab (new Blogger interface).  
  • Choose Blog-posts (edit).    
  • Un-tick the date under "Post Page Options".

4  Remember to make the same date change for every post you write from now on.


Also, if it might be relevant for your readers to know when you wrote a post, make sure that you always manually put the date into each post.


Risks of this approach:

If you follow this approach, you will give a far-in-the-past date to pages that you never want to appear first.  There is a risk that Google might convert the data behind older posts at some time.   If your post-dates get too far into the past, then it's possible that they might not cope well this.   This could be for reasons that seem logical, or because of things that are totally to do with the internal workings of Blogger's database, and make no sense to you at all.

Also, be aware that Google might choose to force the post-date to appear on posts at some time in the future.  At the moment, they don't:  it's your choice.   But you cannot guarantee that they won't change their minds about this, one day.   (Personally I think they probably won't, and I've built a couple of "real" websites that make use of the technique described here.   Just remember it's not guaranteed.)


An Alternative Approach:

Adam of Too-Clever-by-Half has suggested a totally different way to display your posts in reverse order.   I haven't used it, but think that it has a lot of potential in some situations, provided you are comfortable using Yahoo pipes and RSS feeds to display things on your blog.

He has also recently shared another approach he found, which uses a script to manipulate elements within Blogger, and so is more robust than his first approach.


Related Articles: 


Changing the post date for any post

Giving your blog a home page

Using a gadget instead of a post as your home page
 
Stopping certain pages from ever appearing on the home page

Blogs, Blogger and blogger, Posts, Pages and Screens - understanding how blogger works.
Read more > Showing your oldest blog-post first - and the rest in reverse order.

Tuesday, March 23, 2010

Making one post always come up first

One way to make a "Home Page" for your Blogger blog is to simply make sure that one particular Post always comes up first when someone visits your blog.    (This approach only works for Posts, it does not work for Pages.


Overview

Generally, the post that appears first when a reader visits your blog's main address (www.yourBlog.blogspot.com or www.yourDomain.xxx)  is the one with the most-recent Post-date.

One way you can make sure that one particular post always comes up first by re-publishing it every time you post something else - and changing the date to a value more recent than the most-recent post.

This can be tiresome, because you need to remember to edit two posts every time that you post.  But:
  • Its easier than manipulating the date of every single post, and 
  • You can still use the date-features that Blogger has, so it's unlikely to stop working if Blogger something in the future.

Follow these steps every time you publish to your blog:


1  Do the new (or changed) post, and publish it.

2  Edit the post that you want to go first.
  • Go into the Post editor
  • Change the content in a small way (eg put in a space, and take it out again).   
  • Change Post date and time to Automatic.  
  • Publish it.

If you want to change several posts on the same day, you could do all of them, and only do step 2) after the last one.   This will mean that a different post (the most-recently-published one) will come up first for a short time - but this will probably be ok unless you have a very large number of visitors to your blog just after posting.


An alternative:


The option listed above was the only way of doing this for a long time.

But during 2012,  Blogger introduced custom re-directs (as a way to let us delete posts, while not losing the traffic that was provided by existing lists to those posts.   And so this gives another alternative:  you can set up a custom re-direct on your blog's main URL, so that visitors to it always get taken to pretty much anywhere they want.    See the first option in giving your blog a home page for more details about how to do this.


Related Articles:


Making a "Home Page" for your Blogger blog.

Displaying a gadget only on the home page

Showing your oldest post first in Blogger

Changing the date for a post.

Stopping certain pages from ever appearing on the home page
Read more > Making one post always come up first

Volkswagen Jetta Variant

Volkswagen Jetta VariantLançada no Brasil em 2008, a linha Jetta compôs uma situação curiosa em nosso mercado: por ser derivada do Golf europeu de quinta geração, chegou aqui com nome diferente, mas passou a conviver com o próprio antecessor, o “nosso Golf”, que corresponde à quarta geração no resto do mundo.

Como se não bastasse, a nova Variant vem a ser derivada de um “Golf 5,5”: traz a carroceria de antes com a parte dianteira do Golf VI, e acabou conseguindo um excelente resultado. Se a traseira ficou inalterada e as laterais apenas ganharam novas rodas aro 17, a frente foi totalmente refeita, ganhando a grade estreita e negra que une os novos faróis com máscara negra, e parachoque novo, com faróis de milha mais afastados.

Seu interior também foi melhorado, incorporando o quadro de instrumentos do novo Golf e o já clássico volante multifuncional do Passat CC, compartilhado por vários modelos recentes da marca. Além disso, o novo sistema de som com tela de toque e dez alto-falantes, o ar-condicionado dual-zone e a decoração da cabine com apliques imitando fibra de carbono e aço escovado aumentam a lista de novidades da station wagon, que também teve o preço reduzido, custando agora R$ 83.990, sem opcionais.

O pacote de série inclui seis airbags, piloto automático, bancos de couro, sensores de estacionamento, freios com ABS, EBD e EDS e controles de tração e estabilidade. Alguns dos opcionais são os faróis bi-xenon com lavador e o teto solar Skyview. Seu motor é o 2.5 de cinco cilindros e 170 cv, que produz 0 a 100 km/h em 8,9 segundos e máxima de 205 km/h, sempre com o câmbio automático de seis marchas com trocas sequenciais.

Read more > Volkswagen Jetta Variant

Monday, March 22, 2010

Blocking categories of AdSense ads from your Blog

This article is about how to restrict the types of advertisements that AdSense places on your blog.  
 
If you don't have an adult-content warning flag on your blog, then doing this is almost essential for AdSense users, so that you comply with Blogger's Terms and Conditions and ban ads about sex / sexuality.


Overview:

Previously, I've written about setting up Adsense in Blogger, and explained how easy the this is, thanks to the features in the Monetize tab.

Unfortunately, there are a few things that you cannot do in the Monetize tab, and which I believe are essential for every Blogger user who displays AdSense ads.

One step that I strong recommend is stopping malicious use of your AdSense account ID.

Another is restricting the categories of AdSense ads that are displayed - and in particular stopping sexually explicit ads from appearing.

This is because Blogger's Terms and Conditions say that you will only show adult material if it's placed behind an adult-only warning flag - so if you don't stop the ads from showing, you could potentially be breaking the rules.

And depending on the content and audience of your blog, there may be other categories of AdSense ads that you also want to block.


How to block certain categories of advertisements: 

  1. Log in to AdSense (http://www.google.com/adsense)

  2. Go into the Allow and Block Ads tab
  3. Make sure that the Product drop-down (centre of the screen) has Content selected.
  4. Go into the Sensitive Categories tab, and click on the right-hand button beside each category you want to not show on your blog.
    For Blogger, this should include at least Sexually Suggestive, unless your blog has an Adult-content flag
    .
  5. Go into the General categories tab, and do the same.
  6. Go back to step 3, and choose Mobile Content from the Product drop-down.  Then repeat 4 & 5.
    You need to do this even if you don't have a mobile template for your blog:  AdSense's mobile ad-units are being displayed when such blogs are looked at using a Smartphone or similar mobile device.  (They were on one of my sites yesterday, anyway.)
  7. If you use AdSense for feeds, then  go back to step 3, and choose Feeds from the Product drop-down,  then repeat 4 & 5
Once a category is blocked, there will be small red cross-circle and the word "blocked" beside it.


There is no need to press Save, your choices are saved automatically.  


You can turn a category on again by clicking on the left-hand button, ie the one beside the banned symbol.

new adsense interface screen for disallowing certain advertising categories fro all your websites
Yes, the numbers don't make sense:  I used MS Paint to mix them up, so Google cannot say that I'm revealing confidential details about my AdSense performance.


What your readers see:

As far as I know, the changes take place pretty much straight away:  AdSense takes ads from the blocked categories out of the pool of ads that are able to be shown on your site.   (If you have examples where it has taken longer, please leave a comment below.)


Choosing what categories to block:

Google kindly tell you what percentage of recent revenue you would not have got, if you had each category blocked.   You may find this useful in deciding whether to block any other categories.

Personally, I don't:  blocking categories is about making sure that I get ads that are appropriate for my site, not about making revenue.

But it comes down to your blog, and what's the best thing to do in your area.


Blocking just for a specific blog:

Currently, it's only possible to block categories at AdSense account level, not at web-site / blog level.  This is annoying because it may mean that you need to block some profitable categories from some web-sites in order to stop them going on any of your sites.  Hopefully Google will change this feature in the future.


Related Articles: 


Stopping malicious use of your AdSense account ID.

Putting AdSense ads right inside your posts.

Advertising and Blogger - things to consider 

Showing image-only AdSense ads in Blogger

Using Google Analytics to get information about your AdSense performance
Read more > Blocking categories of AdSense ads from your Blog

Saturday, March 20, 2010

Mercedes-Benz C180 Kompressor

Mercedes-Benz C180 Kompressor Cada vez mais receptivo aos modelos de luxo, o mercado brasileiro parece estar bastante sedutor às fabricantes europeias. No caso da Mercedes-Benz, o enfoque está nos modelos mais baratos, como a minivan B170, e agora com o sedã C180 Kompressor, que chega por atraentes R$ 119.900.

Por fora ele apresenta a conhecida carroceria do novo Classe C, que traz desenho elegante a ponto de parecer um modelo ainda mais luxuoso. Seu interior apresenta um pacote digno da marca da estrela de três pontas, incluindo bancos de couro, teto solar elétrico, seis airbags, e sistema de som com Bluetooth. Seu motor é o 1.6 mais potente à venda no país, que usa o compressor para extrair 156 cv e 23,4 kgfm de torque, com câmbio automático sequencial de cinco marchas.

Read more > Mercedes-Benz C180 Kompressor

Changing colors in your Blog

This article is about changing the colors used in your Blogger blog.
 

Changing colours in your blog

The Template Designer is Blogger's core design tool, for blogs with Layout, Designer or Dynamic templates.   (Ref What type of template does my blog have).

The place where you choose the colours in your blog is the Design > Template Designer > Advanced tab

This is far more flexible than the options in the previous colour-chooser tools that Blogger offered.  

You can now choose any colour, not just ones from the default set for your template, by typing in the hex (hexadecimal) code for the colour that you want.


However the screen where you make colour choices is a little busy and complicated:

The item selector, where you choose what item you want to set the colour for is on the left  side, just to the right of the Advanced tab selector.


How to change a colour in the template designer:

  • Go to the Advanced tab
  • Select the item that you want to change
  • Click on any colour from the list(s) provided, or from the colour picker, or enter the hex-value for the colour.

The bottom section of the screen shows you what item is selected (with a red dotted line - on Designer templates only) and  how your blog will look with this new selection.

IMPORTANT:
When you have made all the colour changes, click Apply to Blog in the top right hand corner of the screen.


Changing colours by editing your template


It is also possible to change colours by editing your template in the usual way.

You can either find the colours in the Variables section (usually near the top of the template), and enter different hex values in there, for example:
<Variable name="mainBgColor" description="Page Background Color"
    type="color" default="#f5f5f5" value="#ffffcc">

Or you can find the item that you want inside the CSS section of the template, and set a value there. For example, in this rule for my date-header, I have commented out the existing variable, and added a new hex-code.
h2.date-header {
  font-size: 130%;
  text-align:center;
  margin-top:20px;
  margin-bottom:14px;
  color: #df3333;
  /* color: $dateHeaderColor */
  font-weight: normal;
  font-family: Trebuchet MS, Verdana, Sans-serif;
}
Or you may just want to make a rule that specified colour only, and add it using the Add CSS rule option.


Choosing and specifying colours:

Finding specific shades

I rather like the color tool provided by W3C Schools, at http://www.w3schools.com/tags/ref_colorpicker.asp

This lets you choose a base colour, then it gives you the hex-codes for 19 different options based on the at colour, between black and white.


Colour Wheels:

It may be easy to apply a colour change in Blogger - but that doesn't mean that it's easy to choose specific colours that go well together.   If you need help with this try googling "how to use a color wheel", to find suggestions about a particular colour selection tool that graphic designers use.

Converting RGB to Hex

RGB (red-green-blue) and Hex (hexadecimal) are two ways of mathematically describing colours.   If you need to convert from one to the other, google "convert RBG hex", and choose one of the tools that is suggested.

Personally, I've used http://easycalculation.com/color-coder.php  a few times, but I'm not a colour/graphics expert, and can't say whether it's any better or worse than others.


Related Articles


What type of template does my blog have.

Adding a new CSS rue to your blog's template

How to edit your blog's template
Read more > Changing colors in your Blog

Friday, March 19, 2010

The Law and Your Blog

This is a very brief look at some the legal issues that bloggers (using Blogger and other tools too) should be aware of.  

I am NOT a lawyer.  This is not legal advice.   If you need legal advice, consult a lawyer who's familiar with the internet, blogging, and the legal system in your country

Do legal issues matter?

Emblem-scalesRecently I came across an interesting article from Aviva Directory: 12 Important U.S. Laws Every Blogger Needs to Know.

Firstly, I thought it was amusing that they assumed that US Law was the only one that mattered to bloggers.   But as I read the article, I found that many of the issues they raise are pretty universal:  their answers may not apply to everyone, but the questions do.  For example - who owns the comments that are left on your site?  Can you just delete them?

And as I thought more about it, I realised that I'd instinctively done some very important things on some of my sites:  applying data quality policies ("if in doubt, leave it out"), insisting only only using photos/graphics that I own (copyright), and putting disclaimer statements in.

So, while legal issues might not be top of mind when you're starting a on on-line travel diary, I'd definitely say that if you're planning on blogging long term, and want to be successful, then YES, the law does matter, and you need to spend some time writing policies, and thinking about the issues.


What to do:

The Aviva article is a good starting point:  read it and consider the issues.  See what changes you need to make to your blog, and schedule time to make them.

If you're not based in the US do some reasearch about what the law in your country says about any of the issues that apply to you.

If you own a small business, you probably already have a legal advisor:  at very least, someone who helped you draw up a standard contract, and advises you on any difficult issues that arise.   Make sure that s/he knows if you have a business blog, and can give you advice if you need it.   (If s/he just looks blank when you mention the internet, consider getting a new lawyer!.)

As with many legal issues, the first thing to remember is not to go over the top:  be legal, but keep your response reasonable given the size and popularity of your blog.   Remember that you don't need to do everything today - some things (disclaimer, privacy policy, commenting policy, etc) only need to be added when the risk of legal issues rises because the blog has got more popular.


Related Articles:


Copyright, Blogs and Bloggers

Advertising and Blogger, some things to consider

Giving your blog an attribution gadget

Stop malicious use of your AdSense account

Showing a PowerPoint presentation in your blog
Read more > The Law and Your Blog

Thursday, March 18, 2010

Toyota Corolla 2011

Toyota Corolla 2.0 16vLíder consolidado no disputadíssimo segmento dos sedãs médios, desde sua última mudança visual o Corolla não recebeu muitas outras novidades. Se em 2010 ele apenas ganhou a versão GLi, 2011 foi mais generoso com o japonês: ganhou uma nova opção de motor e uma nova versão de topo, que prometem elevar a disputa pelo segmento a um novo patamar.

Desenvolvido exclusivamente para o mercado brasileiro, o 2.0 16v flex não é uma adaptação do 1.8 16v já em linha, mas sim um produto novo. Dotado de duplo comando de válvulas variável, ele consegue ser melhor que o motor menor não só nas marcas de desempenho, como também nas de consumo. Produz 142/153 cv e acelera de 0 a 100 km/h em 11,6 segundos, com marcas de consumo de 6,2/8,2 km/l na cidade e 10,2/12,8 km/l na estrada (gasolina/álcool).

Das quatro versões disponíveis, o novo motor vai equipar apenas as duas mais refinadas, XEi e a nova topo-de-linha, Altis, que substitui a SE-G. Ambas versões também virão apenas com o novo câmbio automático, que mantém as quatro velocidades, mas incorpora trocas sequenciais, realizadas pela alavanca do console ou por borboletas atrás do volante. As versões XLi e GLi mantém o 1.8 16v Flex de 136 cv, valor invariável com o combustível utilizado.

A XLi, versão básica do Corolla já é bem equipada, trazendo por R$ 61.890 ar-condicionado, airbag duplo, direção elétrica, trio elétrico, computador de bordo. Logo acima há a GLi (R$ 65.660), que incorpora vidros elétricos one-touch para as quatro portas, volante multifuncional com comandos satélite do sistema de som e ar-condicionado digital.

A versão XEi (R$ 75.830) agrega sidebags, bancos de couro, piloto automático e repetidores de luzes de direção nos retrovisores. Já a Altis recebe cabine com revestimento bege e apliques de madeira, faróis baixos de xenônio com regulagem de altura e lavador e sistema de som com leitor MP3 e disqueteira de seis CDs, entre outros itens, ainda que por salgados R$ 89.130.

Read more > Toyota Corolla 2011

Wednesday, March 17, 2010

Moving some posts from one blog to another

This article is about how to copy some of the posts from one Blogger blog to another.


Overview:

Previously, I've written about moving individual posts, or pages, from one blog to another and moving all posts from one blog to another.   They are in separate articles because the techniques used are quite different.

If you only want to move some posts, then you need to choose between:
  • Moving each post individually,or
  • Moving all the posts then and deleting the ones you don't want from the "new" blog.

Before you start, you need to think about what should happen to posts already in the source of destination blog:  if you want to delete them, you need to do it from the Posting / Edit Posts tab (press the delete link beside each one).  Don't just delete the enter blog (from the Settings / Basics tab), because that will remove your access to the URL.


How to decide:

Choosing whether to most post individually, or moving all of them is firstly about maths.

You need to calculate

A = time to move a post individually X number of posts to be moved

and

B = time to export and import, plus { time to delete a post * number to be deleted}


Choose the smallest one.

Except - you may like to figure in the chance of making a mistake, or of wanting to make small changes to come posts along the way.  Possibly you need to consider which approach you're most comfortable with - so it may not even be about maths at all!

Either way, remember that Pages (see The Difference between Posts and Pages) in the first blog, need to be moved individually because they aren't currently included in the export file.


Related Articles: 


Moving all posts from one blog to another

Moving individual posts, or pages, from one blog to another

Converting Posts into Pages

The Difference between Posts and Pages
Read more > Moving some posts from one blog to another

Tuesday, March 16, 2010

Renault Sandero Vibe 2011

Renault Sandero VibeEnquanto não traz nenhuma novidade realmente significativa, a Renault está tratando de se manter em destaque ao apostar em reeditar séries especiais. Primeiramente com a Kids para a decaída Scénic, e agora com a Vibe, para o Sandero.

Comparado com o primeiro, o Vibe atual apresenta como novidades os frisos laterais, antes na cor cinza e agora em preto, os anéis cromados em torno dos instrumentos do painel, e a inclusão da cor vermelho Fogo no catálogo. De resto, ele preserva os faróis com máscara negra, as rodas de liga leve aro 15 em grafite, acabamento interno exclusivo com apliques na cor prata, e lanternas escurecidas.

Também de série vem seu ótimo pacote de equipamentos, composto por ar-condicionado, direção hidráulica, vidros e travas elétricos, sistema de som com leitor de MP3 e comandos satélite. Seu motor permanece o 1.6 flex, de 92/95 cv (gasolina/álcool).

Read more > Renault Sandero Vibe 2011

Monday, March 15, 2010

AdSense and AdWords - what's the difference?

This article explains the difference between AdSense and AdWords, from a Blogger's perspective.

What are they?

AdSense lets you publish other people's advertisements on your blog:

  • You create the posts (or pages) that ads go on or with, choose where ads should go on your blog, and say what colour scheme to use. 
  • Google deals with the advertiser for you, chooses what ads to put in you blog, and pays you if your ads are "successful" (more about that below).

    AdWords lets you advertise your blog (or other website) in search results and/or on other people's websites or blogs
    • You set up the Ad, and say how much you're willing to pay each day and per click.
    • Google negotiates ad placements for you (you're competing with other people who want to advertise in AdSense, and also with advertisers in their other advertising networks), and charges you if readers interact with your ad.

    Costs and Benefits:

    AdSense is free for publishers (you are a publisher if you put AdSense ads on your blog) - and you get paid if your readers view or act on certain that are shown on your blog.

    AdWords is not free for advertisers, but many people think that it is cost-effective.  There is a sign-up fee (varies from country to country - for me in Europe recently, it was E10), and you also pay each time that a reader clicks one of your advertisements, or (in some cases) each time your advertisement is displayed.   You have a high level of control over how much you bid to have your advertisement shown (minimum of 1c per click) and can set a maximum budget per day (eg $1.00).


    AdWords is the tool that may generate traffic for you.

    AdSense is the tool that may generate revenue for you.


    Related Articles: 


    Advertising and Blogger:  Things to Consider.

    Setting up AdSense on your Blog

    Putting AdSense ads inside Blogger Posts.
    Read more > AdSense and AdWords - what's the difference?

    Sunday, March 14, 2010

    Blogger and Other Google Products - an oveview

    This is a listing of other Google products that may be helpful to Blogger users.  Each product is briefly described, with links to the help centre, help forum, and other useful hints-and-tips article.


    Introduction

    Once upon a time, Google made a search engine, and Pyra Labs made Blogger  (or at least that's what Wikipedia says).  Then Google figured that it could be handy to own a blogging tool themselves, so they purchased Blogger in 2003, leading to even more confusion about the difference between Blogger and bloggers, Google and googling.

    They also purchased a number of other products, and build a few (eg AdSense) themselves, too.

    In general, using products from the same company is a good idea, because there are engineers whose job it is to make sure that they work together well.   They're not always 100% successful, but even so, two Google products are more likely to play nicely than two products from competing companies.

    The list below doesn't show all Google products, just those that  are particularly useful to Blogger users.

    Always see the official Google documentation for official answers.

    Product / ApplicationWhat it does Where to get help
    GmailEmail.

    Mail can also be used for receiving comment notifications, and for tracking use of the the Mail2Post feature.
    Help centre
    Help forum

    Blogger-HAT:

    PicasaManage photographs and other image files.

    Blogger puts pictures uploaded using the Post Editor into a folder in your Picasa-web-albums account.

    You can also work separately with Picasa (on your own PC) or Picasa-web-albums (on the internet) too.
    Help centre
    Help forum

    Blogger-HAT:

    AdSenseSelling advertising space on your blog (or any other web-site).Help centre
    Help forum

    Blogger-HAT:

    AnalyticsMeasuring visits and visitors to your website/blog: this tool give you information about who they are, where they're coming form and what they're looking at. Some people say that it's more suitable for small businesses than individuals, but I say if you're savvy enough to make Blogger sing, with is the tool to go for. Help centre
    Help forum


    Blogger-HAT:
    MapsCreating and sharing mapsHelp centre
    Help forum

    Blogger-HAT:

    YouTubeSharing videos
    Note:  though YouTube is linked to Google, your Google account doesn't work quite as seamlessly as it does with the other products listed.
    Help centre
    Help forum
    AdWordsGetting your website/blog included in the sponsored-links section of Google search-results, and in Ads-by-Google in various places.Help centre
    Help forum


    Blogger-HAT:

    Google DocsFor creating, editing and storing documents of all types.

    Help centre
    Help forum


    Blogger-HAT:
    CalendarManaging schedules and calendars on the internetHelp centre
    Help forum
    Web-elementsApplication for ...Help centre
    Help forum
    Webmaster CentralMonitoring your blog / website, and controlling some aspects of how Google's search engine relates to it.Help centre
    Help forum
    Custom-SearchCreating and managing custom-search engines for your websiteHelp centre
    Help forum
    Google AppsManaging custom domainsHelp centre
    Help forum

    Blogger-HAT:  Setting up your custom domain
    FeedburnerApplication for managing feedsHelp centre
    Help forum
    Google Feed API"With the Feed API, you can download any public Atom, RSS, or Media RSS feed using only JavaScript, so you can easily mash up feeds with your content"   Developer documentation
    Help forum group


    Related Articles: 


    Understanding Google accounts

    Blogs, Blogger and bloggers, Pages, Posts and Screens - basic Blogger concepts.

    Blogger and key non-Google products
    Read more > Blogger and Other Google Products - an oveview
     
     
    Copyright © blog
    Blogger Theme by Blogger Designed and Optimized by Tipseo